Need a fun, quick update that will totally change the look of your kitchen? Paint your kitchen countertops!
That’s right, paint right over your tired and ugly laminate kitchen countertops. It’s relatively easy. It just takes time and patience. This is my 2nd time to paint my countertops and I have enjoyed the process and especially the results.
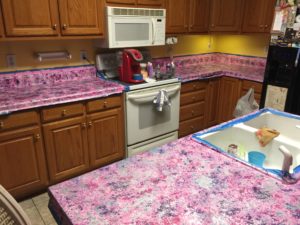
Finished Painted Kitchen Countertops
What you will need to Paint Your Kitchen Countertops
- Primer – Kilz Low Odor
- Paint – The colors will be determined by the look you want. I used a total of 6 colors.
- Glitter
- Sealer – Polyurethane or Acrylic (I’m not convinced that Polyurethane is the best option)
- Paint brushes, small paint roller
- Paint Tape
- Plastic grocery sacks
Color Selection
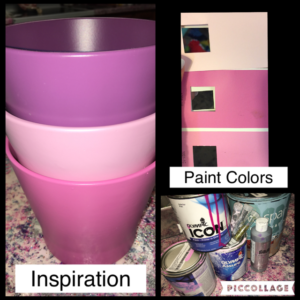
Inspiration & Paint Colors
I’ve always wanted a pink kitchen. When I was a little girl, my mom had a friend (Eloise Else) who had a pink kitchen. I thought the pink kitchen was the most fascinating thing I’d ever seen. I knew then that I had to have a pink kitchen.
Painting my countertops pink is the first step into the transformation!
The inspiration for my kitchen were 3 flower pots that I purchased from Ikea in Kansas City. Based upon these colors, I purchased this paint at Lowes.
In addition to the 3 colors that I purchased at Lowes, I used 3 other paint colors that I had at home:
- Blue/Green
- Silver
- Deep Purple
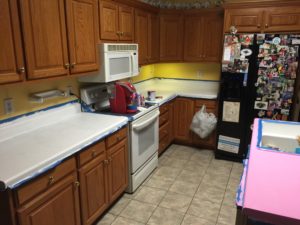
Step 1 – Preparation
Tape the areas around your countertops. Don’t forget the area around your sink and backsplash! Clean your countertops well and sand down any rough spots on the existing laminate.
Step 2 – Primer
Apply a primer on your countertops. I used Kilz Low Oder. Because my countertops had been previously painted, I put on 2 coats of Kilz. I used a brush but didn’t like the results. So, I switched to a small roller to apply the paint. I liked the roller better – went on easier and smoother.
Let the primer dry. I also used a stand fan to help with drying time.
Primer on the Left Counter
Step 3 – Paint Your Base Color
Paint your base color. I used my medium shade for this step. Let the paint dry.
Step 4 – Add Your Colors
This step is when your countertops come alive! You can use a picture for inspiration or design something entirely new and different. I went the “new and different” route.
I applied each color of paint using the same technique of dabbing the countertops with a plastic grocery bag. I did not use a sponge because the plastic grocery bag gives the look that I wanted. I applied one color at a time. You do not need to wait for the paint to dry to add another color.
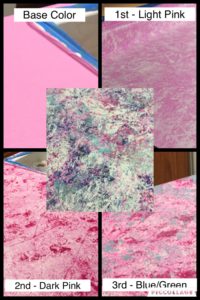
Paint Colors and Application
The order of paint application:
- Lightest pink – Blush Pink
- Darkest pink – Raspberry Pink
- Dark color – Plum
- Random color – Blue/Green
- Silver
- Glitter
Step 4 – Seal The Countertops
Allow the paint to dry completely then apply a thin Polyurethane coat. I used a sponge brush to apply this step. I tried a brush, but the sponge brush was easier to use and was more even. Apply 2 or more coats with drying time in between the steps.
The countertops can be used lightly after drying. However, the countertops will not be fully cured for several days. I didn’t put anything on the countertops for 2 days and then closely monitored how much weight I placed on the countertops (the blender, coffee machine, etc).
One week after I am finished, I’m not pleased with the polyurethane top coat because it is staining. I put my crock pot on the counter and the heat burned countertop. I NEVER had that problem with my previous painting. So, I’m going to add a High Gloss Finish Glaze Coat
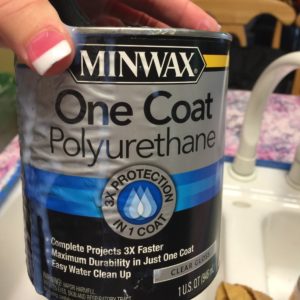
Sealer & Top Coat
Once you have finished your countertops, sit back, relax and enjoy what you accomplished! What do you think about this? Have you painted your countertops? I’d love to see your pictures –
Stay in Touch,
Kathleen